We have planked the hull with 1/4"
okoume plywood. First we make patterns of
doorskin and then transfer the plank shape to the
okoume that has been
scarphed into pieces long enough for the planks. Unfortunately the photos of the planking process mostly went to never never land. Here is a shot of the 2
nd strake being marked on the pattern stock. We patterned one side and then cut out planks for both sides from the same pattern.

Here is the final upper plank being clamped on.

Once the planking was completed we
installed the outer stem, keel and
skeg. Here you can see the outer stem clamped in place while the epoxy sets.

Below the
skeg is visible and we have glued on the
gunwales. We
coved the
gunwales by running them past the table saw blade at an angle. It took several passes but ended up giving us a nice concavity into which we will later attach a piece of 1 1/2" manila line for a rub rail.

Here is a larger scale view of the other side. Now we will sand the outside and add small epoxy fillets to the plank laps. This adds a little strength and makes painting a
little easier.
 Once the hull is cleaned up, we template the floor timbers. On this boat all of the solid wood will be teak. Here the floor timbers have been sawn out and awaiting fitting and installation.
 Below we have fit and installed the floor timbers and also the cleats for the thwarts (seats).
 On this boat we are building inwales with spacer blocks. This allows water to drain out when the boat is tipped, is stronger, allows things to be tied to the boat easily and also looks good. Below we are cutting the spacer blocks to length on the drill press. This gives them concave ends which look nice and are easier to sand when varnishing.
 We need to complete this boat quickly, and when we have filleted all of the floors, cleats, thwarts, keelson and knees it is an all hands call to sand the interior for an epoxy sealer and varnish.
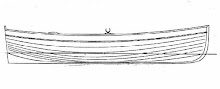
 A view of the hull with primer on it.


